
It’s getting cold here again as winter approaches and that means I’m doing most of my riding indoors. I use Zwift which makes indoor riding fun, but my body has never been able to handle indoor so well. Because the bike doesn’t move it is much harsher on my lower region and I will get all numb down there if I ride over an hour. Not a good feeling, but I hope I have a cure, rocker plate! Lots of people have told me indoor cycling is much more comfortable with a rocker plate, but buying one is quite expensive. So, I decided to build one on the cheap and see how it goes. For less than $70 I’m pretty happy with it, have a look:


Supplies
¾” Plywood 4×4’
8 Carriage bolts 3/8” x 2”
8 Hex Nuts 3/8”
8 Washers 3/8”
4 tennis balls
4 Air conditioner vibration dampeners
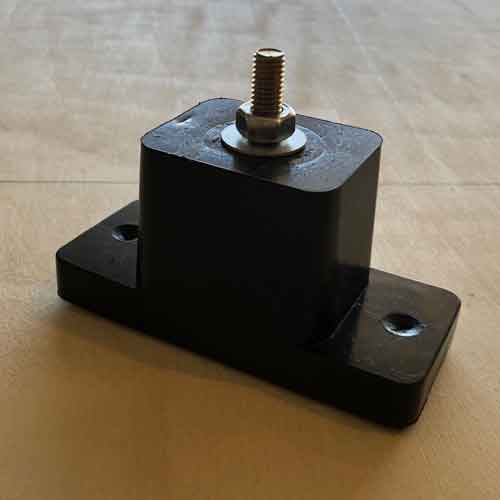
Buy vibration dampeners on AMAZON
Tools
Drill
Jigsaw
3/8” Drill Bit
1” Spade Drill Bit
Straight edge
Cutting the plywood
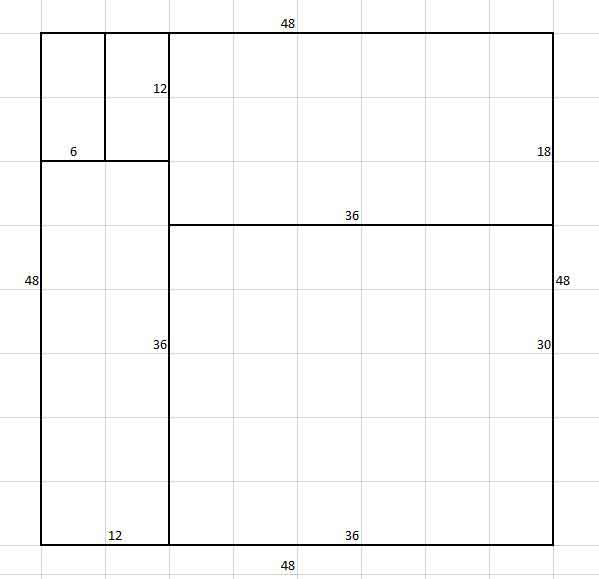
Here is an image with my cuts. This allowed me to make the rocker with only a 4×4’ and no waste. I used a jigsaw for all my cuts with a high TPI for a cleaner cut. Sanded each piece down a bit after cutting.
Assembly
Now you just need to do some drilling and assemble everything. The screws coming out the top of the dampeners are too short to bolt on, so I counter sunk them using the 1” spade drill bit. You have to be really careful with the distance between holes for the front wheel block. If you drill the holes too close the block won’t fit, mine just fit between the bolts.


The carriage bolts all come up through the bottom, so I think a nice mat to put the rocker plate on is mandatory. I cut some rings from plywood that the tennis balls sit in, so they don’t roll away. The balls are near the 4 corners on the back plate, I like how much it rocks. I’m using dog tennis balls.
Performance
So far, I like it a lot. I haven’t done any super big rides yet as the weather isn’t so bad, but I’ve done a few just over an hour and my lower region has been fine. When just riding along at a regular pace I can feel the bike moving slightly from side to side. I’ll update this post later after more miles.
Price
I got this done pretty cheap.
Vibration mounts $15
Plywood $38
Tennis balls $5
Nuts, bolts, and washers about $8
Total: $66
Everything but the mounts came from Menards, so I got a 11% rebate also. A lot cheaper than buying one.
I intend to add big zip ties to hold the trainer to the rocker.
Disclaimer: I’m no professional, so if you choose to use this design it is at your own risk. It’s working for me, but it has not really been tested in any particular way. I have no skills that make me qualified to build this.

So, a month later, what do you think? Anything you would do differently? I just bought a trainer and it is disconcerting how stationary the back end is, locked into the machine. Part of me fears the chainstays cracking from the lateral forces. I might want to build a rocker plate like yours, since I have ¾ inch plywood scraps in the basement.
LikeLike
I can’t think of anything I’d do differently. I’m very glad I did it on the cheap. Thought I might regret not making it a full plate, but so far, I don’t. My only regret is that I haven’t been riding more lately.
LikeLike